DIY | Glitter Ombre nails tutorial
I'm a year round glitter lover so when the festive season rolls around, it makes for the perfect excuse to dial it up. My sequin wrist wrap is one way I sneak in a little more sparkle into my look and yet another never fail way is on your nails. While glitter nail varnish is great and all, the glitter ombre nail shows more technique and will make you stand out in any crowd.
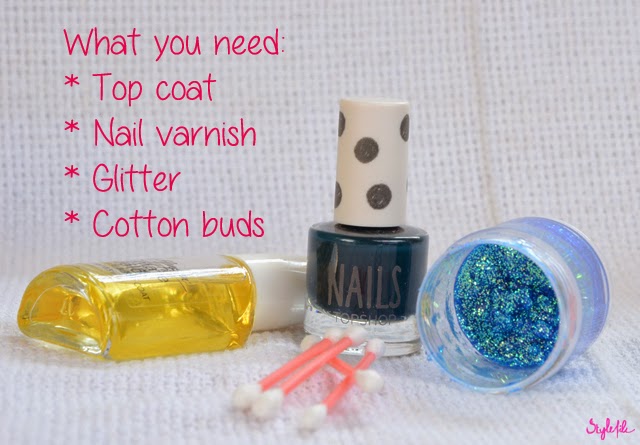
I've used a paste glitter which makes it pliable. If you have only loose glitter at your disposal, mix it with a small quantity of water, just enough to make it damp. This technique is easiest on medium to long nails. A flat, solid shade of nail varnish works best so make sure you select a contrasting shade to your glitter for the best effect.
A base coat is optional but one I always opt for so once you finish with that, get down painting your nails like its any other day. Paint one coat. Pause for it to dry. Then paint another coat.
Don't wait for your last coat of nail varnish to dry completely. It needs to be slightly sticky to hold the glitter. Using the cotton bud, apply the a thick line of glitter on the tip of your nail.
Then use the cotton bud to pull the line of glitter downwards, in the direction of your nail bed. Make sure to do this gently and swiftly. Bring the glitter to the mid centre of the nail so that the base of the nail is bare. Go over the tip of the nail with more glitter to create the impression that the glitter is heaviest at this point.
The technique can take some practice and a few smudges till you get it perfect. Make sure you do the same for your remaining 9 fingers. Once the glitter has dried out, cover it up with a transparent top coat.
And there you have it - your digits are sparkly and party ready. I'd love to see you try this tutorial so let me know if you do!
xo
Dayle
I've used a paste glitter which makes it pliable. If you have only loose glitter at your disposal, mix it with a small quantity of water, just enough to make it damp. This technique is easiest on medium to long nails. A flat, solid shade of nail varnish works best so make sure you select a contrasting shade to your glitter for the best effect.
A base coat is optional but one I always opt for so once you finish with that, get down painting your nails like its any other day. Paint one coat. Pause for it to dry. Then paint another coat.
My nail varnish tends to appear streaky after just one coat so I'm going with two coats of nail varnish. Once my nails are painted with the solid shade, I want them to appear opaque for the glitter to appear most visible.
Don't wait for your last coat of nail varnish to dry completely. It needs to be slightly sticky to hold the glitter. Using the cotton bud, apply the a thick line of glitter on the tip of your nail.
Then use the cotton bud to pull the line of glitter downwards, in the direction of your nail bed. Make sure to do this gently and swiftly. Bring the glitter to the mid centre of the nail so that the base of the nail is bare. Go over the tip of the nail with more glitter to create the impression that the glitter is heaviest at this point.
The technique can take some practice and a few smudges till you get it perfect. Make sure you do the same for your remaining 9 fingers. Once the glitter has dried out, cover it up with a transparent top coat.
And there you have it - your digits are sparkly and party ready. I'd love to see you try this tutorial so let me know if you do!
xo
Dayle


Comments
Love
Nitika
PS- New outfit post up on my blog - http://www.theshopaholic-diaries.com/2014/12/ootd-all-about-that-bass-curvy-style.html